Tuesday, May 31, 2011

Two birds, One stone


Busting a Common Myth, & My New Favorite Snack!

Here we have it, my first post with some info about my diet! I figured I'd get started anyways because my diet and fitness seem to be winning by a landslide for new things to post about!

Preface: Alright, so the number one thing I get asked about is my weight. People frequently ask me about my fitness routine and my diet. Well to be honest, I don't do a WHOLE lot, however, that isn't to say that WHAT I do won't yield results if followed. The reason I say this is because people who started to follow the routine I kind of grew up doing, not knowing any better, actually lost weight. For example when my boyfriend moved in with me he lost 25 - 30 lbs. in a couple of months! It sounds really shocking, but his lifestyle before he moved in with me was entirely different. The foods he ate were different and when he ate was different. I will do a separate post on this another time, because I'm kind of a freak of nature and it will take a little bit of explaining to do in order for this to all make sense. It will be a little bit of a longer post since I have weird eating routines; I'm very habitual, and I also eat very specifically. Right now I'm just going to talk a little bit about one of my new favorite snacks. When I said I was habitual, I mean it. I eat this snack nearly every day and let me tell you some of the benefits of this deliciously decadent green dip!


Myth: Avocados are bad for you and will make you fat.


So up until this past year and a half I wouldn't go near an avocado with a 10 foot pole. Actually, I lie. I would eat it but only IF it was so well masked I didn't know where or in which form it was hidden. Now however, my gosh, it is in my salad, on my plate, in a dip, spread, topping in some form or SOME HOW. Currently I've been obsessing over guacamole. I've made it on my own and bought various packaged varieties. My favorite to date is Wholly Guacamole. Now, I know that a lot of people LOVE avocados just like I do, but steer clear of them for one reason: it is STUPENDOUSLY high in fat! Wondering why I used the word stupendous over other adjectives? Because it is GOOD fat. Most people don't know the difference, but let me break it down for you. GOOD fats are those that come from vegetables and are liquid at room temperature (chilled however, they will turn to solids), BAD fats are those that usually come from animals or animal by-products, and in contrast to good fats are solid at room temperature. Good fats include monounsaturated fats and polyunsaturated fats. The difference between the two is only chemistry. The opposite, bad fats, would be saturated fats. Poly and mono unsaturated fats promote heart health, and THINNESS. So, the thick white grease that's left over after you cook bacon, that would be bad fat, verses olive oil you're using for your salad dressing which would be good fat. Although, just because I say good fat doesn't mean it is good in excess. While it's true it still is MILES above being better for you than bad fats, it shouldn't be consumed in copious amounts. Why? Calories. Fats in general have 9 calories per one gram, that's a looottttt of calories. Limiting them is the best way to keep calories down, but replacing your regular calories with this good fat can be beneficial to your heart, health, and figure--it cuts down your belly fat (when replacing high carb diets with monounsaturated fats)! And one more HUGE reason for us gals to consume more monounsaturated fats? It decreases risk of breast cancer according to a Swedish study!!

Reduce belly fat!


Benefits of avocados!

  • High in monounsaturated fats which lower cholesterol and prevent heart disease! (Replace 5 percent of your saturated fats with monounsaturated fats to cut risks of a heart attack by over 1/3!!)
  • Has 25% of your daily requirement of vitamin C
  • Has Vitamin A, Vitamin E, Oleic Acid, Folic Acid, Cartenoids (great for eye health), Calcium, B6 and more soluble fibre than any other fruit!
  • Has 60% more potassium than bananas!


Quick tip:
Absorb more antioxidants from your tomatoes and peppers in your salads by adding avocado oil!


20 Minute Beauty:

  • All famous avocado mask: I'm sure we've all seen this in the movies, well it's simple enough to do! Mash up an avocado add a tablespoon of organic honey (which has antibacterial and anti inflammatory benefits). Avocado has specific sugars like D-manno-heptulose which can improve the structure of the epidermis by boosting collagen as well as providing a protective antimicrobial barrier. Apply it to your face for 15-20 minutes to reveal more radiant and nourished skin!
  • Hair mask: Take 1 ripe avocado and mash it well. Mix 1 tbsp of honey and 1 tbsp of olive oil. Mix them well. Apply it to your scalp and using a wide toothed comb smooth it through your hair. Wash it off after 20-30 minutes. Do this up to once a week for shiny manageable hair!
  • Body butter: Smooth mashed up avocado over rough patches of skin for 20 minutes to soften the driest areas of your skin!
  • Big date? Woke up with puffy eyes? Take a slice of avocado, the same as you would with cucumber, place it under the eyes for 20 minutes, relax, and done. Puffy-eyes-begone. Avocado, like cucumber, has nutrients that stimulate circulation! 


And now for the best part, why I love avocado. GUACAMOLE!
Why it's good not only nutritionally for your diet, but also good at helping you stay on your diet! 
Well first of all it's delicious, it's a health food that doesn't taste like a health food. But it is also very filling! I buy packages of Wholly Guacamole from the grocery store which are preservative and chemical free, but also the best tasting guacamole I've yet to find. I will scoop about 70-80 grams of guacamole in a bowl and that fills me up for a small meal replacement. Half of the contents is 198 calories but what I eat is between 140 and 160 calories. And those of you that are lucky might even live somewhere where the 100 calorie snack packs are available! I eat it with Tostitos Tortilla Rounds. There are approximately 40 chips per 50 grams for 270 calories, I consume about 35 grams which is 189 calories. I know they are deep fried but I haven't found a baked alternative in Canada, although I have seen baked Tostitos tortilla chips in the US. You could also make your own, which would be a little bit more preparation by cutting up tortilla flat into bite sized pieces, brushing them lightly with olive oil, seasoning them, and putting them in the oven until they are crispy. No doubt this would reduce the calories from fat, but requires more time. Also, don't be afraid to spread guacamole on a cracker, on a sandwich, as a spread on flat bread, or even eat it on its own! In any way, shape, and form it is simply amazing!

Therefore a very filling and deliciously satisfying snack would be:
140 - 160 Calories from guacamole
189 Calories from tortilla chips
= 329 - 349 Calories total

I find savory foods tend to feel more like meals. The great thing is, this feels and tastes like a meal. It keeps me satisfied for hours. I don't feel starved even hours after eating this. Because avocados are so high in fibre (both insoluble and soluble) which your body needs to keep its digestive tract running efficiently. But what fibre also does is it slows the breakdown of carbohydrates in your body which makes you feel full for longer! How could it get any better? :)

I'd like to close by saying myth officially BUSTED. 

Saturday, May 21, 2011

My take on Katy Perry's E.T. Warrior Makeup!

So let me preface by saying, I was so in love with the look of this makeup when I watched the video that I wanted to recreate it but make it wearable so that I could leave the house in it. HAHA well that didn't end up happening. I started off by taking high quality screenshots of the video on VEVO to start my transformation. And while I was trying to make this look "wearable" I ended up copying the look as closely as I could (apart from the warrior paint) stroke for stroke. I still love the makeup, I wish I could find a way for it to be acceptable in public haha! The tutorial will be on my YouTube channel, and when it is finished uploading I will post the video to this page. Below won't be a run down of what I did to achieve the look since it is very detailed and takes a long time, but I am going to list some pointers!

First, tape! If you're trying to create a perfect angle to use as a guide, I highly suggest taping from your lower lashline, at an angle out and upward toward your temple. This not only gives you a clean guide to work with afterward but it keeps the area under the tape clean which will make your lines look much more defined!

Curl lashes well PRIOR to makeup application. You don't want to risk messing up your hard work, whether it be this look, or another labour intensive look, in one of the last stages of completion!

Second keep cotton swabs nearby. Preferably a generic brand. I find the Q-tip brand tries to be more "plush" so you get lots of cotton on your swab, whereas generic brands tend to be more tightly wrapped and use less cotton. Think about generic toilet paper vs. non-generic, generic reminds me of sand paper, while non-generic is soft and gentle haha. Cotton swabs are great for "oopsies". Which trust me, I made hundred of.

Cutting the crease. This is a technique a lot of really gifted and talented makeup artists use. It is a precise sharp line that makes makeup look incredibly artistic and dramatic. An easy way to start cutting your crease is with an eyeliner in the color of your choice. The fine tip and precision your eyeliner is going to provide will make an easier transition into placement of color and sharp perfect lines. Eyeshadows can sometimes be messy, and without a steady hand can end up everywhere and not as "clean", "sharp", or "cut" as desired. Also, for cut creases, if you're looking to venture into this world, matte shades work better than glittery or shimmery shades. Shimmery shades have more fall out because in general they are more loosely packed from the fine particles of shimmer in the shadow.

Making your lines look sharp: If you have problems making your lines look clean and sharp and easy way to trick people into thinking you're an expert with precision is to take a flesh toned creamy concealer or base to use next to any line you want to appear sharper and more defined. What I did was I took my MAC paint pot in the color Soft Ocre and I took a small synthetic precise brush (MAC 231 brush) and created brightness along my lines on the inner corner of my eye. I used a flesh toned paint pot in this area and not a creamy concealer because I don't want the makeup to move or crease. If you're working with color, same rule applies, use some form of product in the same manner to clean up your lines (covering any blemishes or flaws in your precision work). For under eye area, keeping the area clean and sharp is easier. Take a creamy concealer of your choice, I used Bobbi Brown's creamy corrector in Light Peach and a synthetic concealer brush. I used the soft pliable bristles of the concealer brush to create a sharp line of the shadows on my lower lash line by sweeping/dragging the concealer in a clean smooth motion along the line I was already trying to create.

Keep brush cleaner near-by so you can reuse your brushes! I applied mine to a cosmetic round and applied it to a hard plastic surface so that I could reuse brushes that don't require a long drying time. After cleaning off the product off the brush I'd dry it well. Not drying it properly will create "crusts" on top of your eyeshadows. 

For incredibly clean, sharp lines

Be patient young grasshopper, doing any finely detailed look requires time and practice. I messed up so many times on the same areas it was ridiculous. That's what cotton swabs are for! Have fun with it, it doesn't have to be perfect, make it your own!

Have everything you need close by because complicated looks can take awhile, and the best way to lose motivation is to not have what you need near you haha.

Plan your attack first, think of your complicated looks in layers and think about what needs to be done first and last. That way you don't have to wash it off and start again! :)

And voila, some tips on helping any of you, like me, with less than expert abilities appear like experts! :)


Below are the screenshots I took to use for reference!


Products Used
- MAC Soft Ocre Paint pot
- Scotch Tape Matte Finish/Magic Tape
- Mixed MAC Wedge with MAC Grain eyeshadow
- Rimmel Special Eyes Precision liner in Rich Brown
- MAC Corduroy eyeshadow
- MAC Blacktrack fluid liner
- MAC Bronze eyeshadow
- Bobbi Brown Creamy Corrector in Light Peach
- Too Faced Naked Eye Palette Stiletto eyeshadow
- Laura Mercier Metallic Cream Eye Color in Platinum
- MAC Soft brown eyeshadow and MAC Corduroy eyeshadow mixed
- QUO #808 False Lashes with Duo Lash adhesive
- Obsessive Compulsive Cosmetic's Lip Tar in Petty Beige
- Gosh Giant Sun Power 001


Brushes Used
- Large generic brand shader brush (eye)
- MAC 266 Small Angle brush (eye)
- MAC 219 Pencil brush (eye)
- MAC 210 Precise Eye Liner brush (eye)
- Smashbox #15 Definer brush (eye)
- MAC 231 Small Shader brush (eye)
- Lise Watier Blending brush (eye)
- MAC 214 Short Shader brush (eye)
- MAC 321 Lip brush (lip)
- MAC 109 Small Contour brush (face)


A little update!

So I know that it has been a LONG while since my last post. I often get complaints that my blog is neglected, and it is. It feels like all my streams connected to my YouTube channel have become neglected. I want to give this blog a little bit of a face lift so that I can post here about things other than makeup as well, since for the most part they have been tutorials. I'd like to start posting things I'm in love with, foods, recipes, clothes, just whatever. I feel like that might give me a chance of becoming more active! I'd love feedback! :) Also, I'd love if all you lovelies kept in touch with me, I now have Facebook and Twitter for my YouTube friends! Add me as a friend so we can get to know each other! Twitter.com/Kristi_AnneB

Monday, December 6, 2010

Sultry golds


Hello beauties! Here is the third, unintentional, installment in my holiday look series! I was wearing this particular look in my giveaway video and I received a bunch of messages and comments on the makeup I was wearing in the video so here is the tutorial for it! As with any of my looks involving glitter, it can easily be left out and a very glowy gold smoky eye can be achieved. I've been wearing this look a LOT lately without the glitter and I must say I think it will be in one of my go-to looks because I absolutely adore the way that the UD eyeshadows give an amazing glow to the eye... they really give you that stand out quality! Below are a list of the products I used to achieve the look! :)

Products used:

Eyes:
Laura Mercier Eye Basics Primer - Wheat (brow bone)
Benefit Creaseless Cream Shadow - Birthday Suit (lid)
Urban Decay Naked Palette - Smog mixed with Half Baked (lid and lower lashline)
Urban Decay Naked Palette - Hustle (crease, blended up and half of lower lashline)
Urban Decay Naked Palette - Creep (crease)
MAC Eyeshadow - Brule (brow bone)
MAC Pigment - Vanilla (pressed) (patted over brow bone)
Urban Decay Naked Palette - Sidecar (inner corner highlight)
Make Up For Ever glitter - #11 (bronze gold)
MAC - Fix + (to adhere glitter)
MAC Fluidline - Black track 
Lancome Hypnose Mascara - Black

Face:
Revlon Photoready Foundation - Golden Beige
MAC Powder blush - Trace Gold (cheeks)
MAC Powder blush - Honour (cheekbone highlight)

Lips:
OCC Lip Tars - Conquest, Pretty Beige, Hush (blended together for a nude lip color)

Thursday, November 25, 2010

New Years and Holiday Glam

Hi Girlies! So here are the products I used for my most recent holiday look. It was super easy, someone who has never picked up an eyeshadow before could perfect this look! :) Below are a list of the products I used. 


(Click on image to Enlarge)


Products used:


Eyes:
Laura Mercier Eyes Basics Primer - Wheat
Urban Decay Naked Palette - Darkhorse 
Bare Escentuals Lash Liner - Leatherette
MAC Eyeshadow - Brule
Urban Decay Naked Palette - Virgin
Urban Decay Naked Palette - Smog
MAC Fix +
MAC Reflects - Antique Gold
Urban Decay Naked Palette - Sidecar
Urban Decay 24/7 liner - Zero
Lise Watier Glitter Liner - Smokey Gold
Lancome Hypnose Mascara - Black


Face: (Not shown)
Revlon PhotoReady Foundation - 006 Golden Beige
MAC Powder Blush - Trace Gold
MAC Powder Blush - Honour 


Lips: (Not shown)
Obsessive Compulsive Cosmetics - Conquest
Obsessive Compulsive Cosmetics - Pretty Beige
Obsessive Compulsive Cosmetics - Hush


Brows:
MAC Eye Brows - Lingering


Brushes:  
Generic Large Shader Brush
MAC 224 Blending Brush
MAC 210 Skinny Liner Brush
MAC 227 Dense Paddle Brush
MAC 266 Small Angle Brush
MAC 242 Flat Synthetic Shader Brush
Generic Small Shader Brush
MAC 219 Pencil Brush

Saturday, October 23, 2010

For all my sexy Playboy Bunnies ;)

This summary is not available. Please click here to view the post.

Vampire Choker How-to:

Alright everyone, so as I promised here is the Vampire choker instructions. My apologies for this being VERY late, but I completely forgot about it because when I went to post it initially blogger was doing maintenance and it totally slipped my mind! So here it is!

(Click on the images to enlarge)


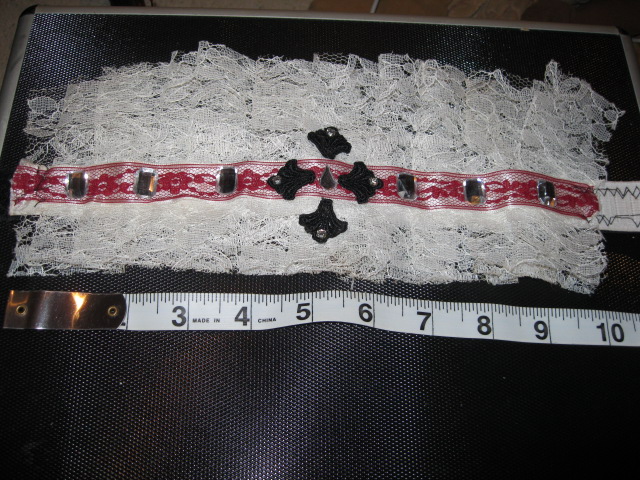
Alright so I'm going to try and make this as quick and easy as possible! Here are some pictures of the things I used to create the choker (missing the cream colored ribbon, and the sewing machine, fabric glue, and gems)


In this photo: White thread, measuring tape, black embellishments with diamonds crystal edges (I bought these at a fabulous fabric store in Vancouver called Dressew), velcro, elastic banding.


In this photo: Wide antique white bridal lace (this is common stuff I see often, I picked it up in the bridal section of my dollar store), ball tip pins, needles, burgundy seam binding (the red picture just shows the brand, width, length, and all that jazz, this is also very common, I picked this up from Fabricland), and scissors


In this photo: Hot glue gun! 

Dimensions


The width of the lace I used, as you can see, was 6 inches wide. (For me only 4 inches was needed)


The entire length of my choker measured 15 inches. Leave extra so that you can adjust it on your neck and it is comfortable! Remember that the back wraps around and covers the velcro so you lose several inches right there :)


The length of the piece itself is only 10 inches, outside of the 10 inches is the elastic banding/velcro.

I trimmed my lace after I made the entire piece so that the fringe didn't go too far down my chest and sit weird. I trimmed it down to 4 inches.


Directions

Step 1:

The first thing I did was cut my lace. I used a fairly long piece of lace and then started to pleat it so that you could see about 1.25 - 1.5 inch pleats. This takes up quite a large amount of lace so I used more than I thought I needed (you can always cut more off later, but you can't add more on). To hold the pleats in place I secured each pleat with several ball point pins. 

Step 2: 

Once I had my pleats done, I cut a length of elastic banding that wrapped around my neck and had some wiggle room so I wasn't choking myself haha (for reference my neck is 10.5 inches) You want to cut the elastic band so that you have enough room on both sides to close over the velcro. I used extra room so that the velcro wouldn't come undone.

Step 3: 

Take the needle and thread and begin stitching the elastic banding to the lace. I put the elastic in the very middle of my lace so that I got a kind of ruffled effect on both sides of the lace, kind of like a jesters neck ruff. 


As you can see the stitching isn't perfect. My apologies for the makeup on the elastic, but since I wore this for Halloween the body makeup rubbed off on it.

Step 4: 

The ribbon and seam binding. I took a 10 inch length of seam binding and used fabric clue to adhere it to a 10 inch piece of cream colored satin ribbon so that it would stand out against the lace. After that I attached it to the rest of the neck piece.

Step 5: 

Embellishments! I had this brilliant idea that I was going to start a headband business and make fabulous headbands and the whole world would want them (HAH!) so I had all this stuff lying around. I had gone to a fantastic store in Vancouver called Dressew that sold all different kinds of fabrics and anything you need to make pretty much any sort of clothing piece. So I bought little cloth embellishments with crystals on them, I had them in white and black, but used the black because they are more gothic. I laid them out to look like a cross in the middle of the choker and then adhered them with hot glue. Then I took a tear drop shaped gem and put it in the center (roundest part facing down). I also had a ton of Martha Stewart scrapbooking self adhesive gems (that I picked up from Walmart) kicking around and placed 3 on each side equal-ish distances apart.  

Step 6: 

This is where I used my sewing machine, but you could easily skip the machine and just super glue, or hand stitch the velcro to the choker. Easy as that, cut out a piece of velcro you need for the choker and stich it to the ends! Make sure that you put one side of the velcro on the top side (preferably the sharper side of the velcro for easy removal and the fuzzier side on the under side of the velcro). If not you won't be able to close your choker :)


Step 7:

This is where I made my adjustments to the length of my choker. I wrapped it around my neck and trimmed it where it was too long (for me this was close to my collar bone). I trimmed 2 inches off the bottom and volia! A choker! I made two of them, and it really doesn't take all that long at all!! Super easy and quick, and really made everything come together I think! :)

Hope you enjoyed!! :)

Wednesday, October 20, 2010

Calling All Sexy Vampires!

Hello all of you beautiful ladies, and possibly beautiful men!

So Halloween is quickly approaching and I couldn't be more excited. I've just filmed a tutorial for the makeup/costume that I wore for Halloween last year and I hope that my little tips and tricks will inspire you to add on to your Sexy (insert costume name here) Halloween Costume!

Below I will list all the products that I used for the tutorials in order of the videos (ie; Part 1, Part 2, Part 3)

But before that I will be adding information about my costume.

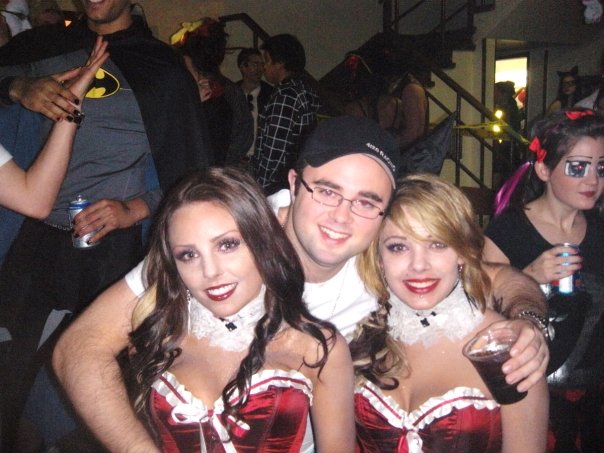
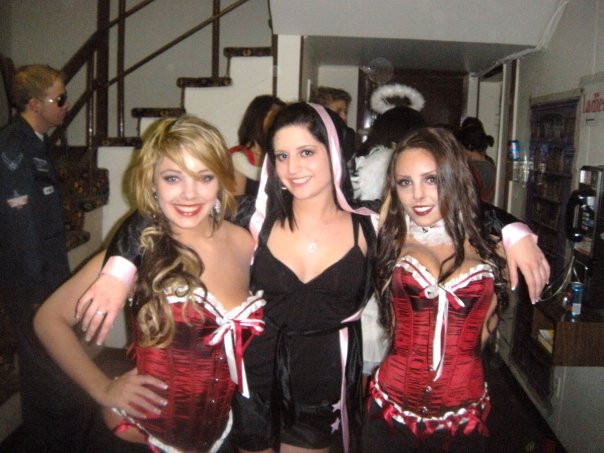
Last year I was a Volturi for Halloween, and incase you are unfamiliar with the term, it is essentially the "Vampire Royalty" from the Twilight saga. So instead of dressing like a "true" Volturi in deep black cloaks and attire, I wore burgundy so that even if people didn't know what a Volturi was, they'd still have a pretty good idea that I was a "sexy vampire" :)


I bought all of my costume pieces from eBay, except for the choker, which I made but will explain through steps.

The bustier/corset I wore was fantastic. This is still available on eBay, but since it is so close to Halloween the only point in posting the link is for viewing purposes.

http://cgi.ebay.ca/Hot-Sexy-Ruffles-Corset-Lace-Up-Back-Bustier-Thong-2343-/220677100097?pt=US_CSA_WC_Intimates&var=&hash=item79138a4e74#ht_2199wt_754


Since red is a very traditional color for a corset it is fairly simple to throw together a quick "sexy vamp" costume!

The cloak I wore was my favorite part, and also the priciest piece. However, having searched for the items POST the release of New Moon, it has become apparent that everything I purchased PRE the release of New Moon has dropped significantly in price... so you can imagine my reaction. The following link is the exact same cloak that I bought. Although it is much less red in person and more of a red/burgundy shade.

http://cgi.ebay.ca/Lined-Red-Velvet-Cloak-Cape-Wedding-Wicca-Medieval-SCA-/250699601355?pt=LH_DefaultDomain_0&hash=item3a5edc55cb#ht_2370wt_837


The shorts I wore were black spandex cheerleading shorts, and although I wasn't able to find the listing again, these shorts are very easily duped.

The red boots that I wore, surprisingly are still on eBay. Well, the ones on eBay are shockingly close. The only difference is that there are no pom pom's on mine, but if you saw the tutorial, you'll know that these were a mistake I made and I wouldn't repurchase.

http://cgi.ebay.ca/RED-Flats-knee-boot-fur-top-Size-sz-7-/320601458806?pt=US_Women_s_Shoes&hash=item4aa5560876#ht_1053wt_956


List of products used


Part One: Eye, face and body makeup

Body:
Covergirl TruBlend 405 ivory
Revlon Skinlights Pink Light 02
Stila Illuminating gold finishing powder

Face:
Don Post Corpse Grey
Covergirl TruBlend 405 ivory
Make Up For Ever HD Microfinishing powder
Lise Watier color corrector portfolio

Eyes:
Laura Mercier eye basics primer wheat
Sephora eyeshadow guard
Nars Zardoz
MAC Star Violet
Cle de Peau 108 Satin Eye Color
Smashbox #10 Brush
MAC Beauty Marked
MAC Trax
MAC Plum dressing
MAC Mylar
MAC Black Track
Lise Watier Amethyst Eye glitter
Quo 808 False Lashes
Quo 804 False Lashes
Covergirl Outlast lipstain 405
Covergirl Outlast lipstain 420
Maybelline Expert Eyes Kohl Liner Prune
Covergirl TruShine Currant Shine

Brushes used:
MAC 188 Brush
MAC 182 Kabuki
MAC 181s Kabuki
MAC 225 Brush
Concealer brush (Generic)
Paddle brush (Generic)
Smashbox #10
MAC 227
Sonia Kashiuk Arc Liner Brush
Smashbox #15
MAC 210


Part 2: Facial Contouring, Highlight and Sparkle

Face:
Espresso
Omega
Charcoal brown

Highlight:
Laura Geller Liquid Candlelight

Body:
Jerome Body Glitter Silver and Gold (Not used on video but this is recommended for 2 tone sparkle)

Brushes:
MAC 224
MAC 225
MAC 182


Part 3: Katherine Pierce Vampire hair

(To see how I teased my hair prior to filming see Kim K inspired Hair Tutorial video under the YouTube section of my blog)
Osis + Dust it by Schwarzkopf
Danny Co Boar Bristle Teasing comb
Amika Clipless Iron (Triple Barrel Set, used 19mm 3/4" curling rod)
Redken Spray Starch (this stuff is amazing!!)
Goody brand hair pins
An ellipse shaped hair clip (I removed the backing and hot glued it to a halved hair comb clip)

Thursday, October 14, 2010

My MAC Eyeshadow Palettes

Hi all!

So I frequently get questions regarding my MAC palettes so I thought I would post some pictures of my palettes! I have a ton of eyeshadows that I still need to depot but to be honest I absolutely HATE buying palettes when I could buy something more fun... like another eyeshadow HAHA go figure. So while this is a huge majority of my palettes I do have a lot of other L.E. (Limited Edition) eyeshadows that have yet to be added. But I figured now is as good a time as any so here we go. I should preface by saying, my palettes aren't in fantastic condition, I have quite a few that I've had to repress because they've cracked or broken during travel haha so they look a little bit worn and rough around the edges. :P


Neutral Shimmer Palette
(Click the image to enlarge)


Top Row left to right: Woodwinked (I had to re-press this after it broke and now has some Electra mixed in, unintentionally of course), Tempting, Bronze (this one I also re-pressed), Mulch, Sable

Middle Row left to right: Twillery (My absolute favorite MAC shadow from the 2005 Inventive Eyes quad), All That Glitters, Honesty, Patina, Knight Divine

Bottom Row left to right: Carbon, Typographic, Print, Smoke and Diamonds, Electra

So if you compared this palette next to all my other palettes I think that it would be pretty clear that this is my favorite! Inside I'm just a little girl obsessed with sparkle and this palette gives me what I love: Glitter!! Haha. 

Some of my faves are:

Twillery (I have yet to find a dupe so I reserve this for the most special occasions) This is a gorgeous tan gold with gold shimmer. It a tan taupe version of Woodwinked, but it is more cool toned than warm. 
Woodwinked, is a gorgeous warm, antiqued golden, bronzey shade with an intensely pigmented, creamy, finish. It provides the most gorgeous glowing sheen and metallic finish. This would be my favorite shadow from the permanent collection!
Bronze is a high shine, metallic, very deep brown bronze. It is stunning. 
Sable, like Woodwinked, has a high shine finish. It is a plum brown that looks amazing on everyone! 
All That Glitters is a gorgeous golden champagne, this is very pigmented, very high shine and gorgeous!
Patina this is a gorgeous taupey color with beautiful fine shimmer. This is supposed to be a frost, but to me it is like a satin shade with some very gorgeous teeny flecks of multi colored gold and pinky shimmer. This color is great all over the lid, or used to blend shadows out over the crease.
Print, this probably seems like an odd color to choose, especially since the theme of my favorites seems to be that they are intensely pearlized shades (to me this means that they provide a high sheen, metallic finish). Print however is a creamy charcoal gray shade. It is a satin eyeshadow that has a very fine shimmer, literally one speck here and there, until recently I thought the shimmer was just dust from my Honesty eyeshadow right above it, and to be honest (Ha ha) I'm still not convinced that it isn't! Nevertheless this is the creamiest, and smoothest of my gray/black shadows from MAC. The finish is not dull and powdery, but smooth, creamy and flawless!


Highlight Palette
(Click the image to enlarge)


Top Row left to right: Blanc Type, Brule, Vanilla, Vapour, Mylar

Middle Row left to right: Motif, Naked Lunch, Shroom, Phloof, Retrospeck

Bottom Row left to right: DreamMaker (L.E.), White Wheat (L.E.), Nylon, Rice Paper, Dazzlelight

This palette would definitely have to be my second favorite palette! I just love looking at it, the colors just scream sparkle to me. And although I have learned to love a matte eye, and even though I will more often than not prefer the look of a matte eyeshadow on myself, inside I can't help myself when I see a little eye bling!

Some of my faves from this palette are:

Blanc Type, this Matte² eyeshadow this looks nearly identical to both brule and vanilla in the pan but applied it is incredibly pigmented and creamy. It is definitely a matte shade but it is so creamy that it just blends and provides an incredible gradient effect to whatever color you used blended out of your crease. LOVE it! 

Brule is a very fair flesh toned shade, much like Blanc type it is great for applying to the brow bone as a color to soften and blend your crease work. Although, it is much less pigmented than Blanc Type and a little more natural because it is not as light. 

Vapour, This looks somewhat boring in the pan, it looks like a very light barely pinked white. But on the skin it has an amazing glow and a very very fine shimmer that just adds a piece of shimmer here and there that picks up the light, not like a glitter ball, but like you've been kissed by a fairy... yes, it looks like you've gotten a little fresh with Tinkerbell. Haha. I add this to the inner corner of my eye, and those little silver flecks of shimmer just add something angelic to my look. I love it.

Naked Lunch is another one of my favorites, although since this has a huge following, I'm sure no one is surprised! It is gorgeous on its own, as a highlight on the inner corner, under the lower lashline or directly under the brow!! Very multipurpose! It is a gorgeous light pink pearly shade that looks great on any skin tone!


White Wheat is another eyeshadow from the Inventive Eyes quad from 2005 (like Twillery from my Neutral Shimmer Palette). It is incredibly unfortunate that this shade is discontinued. The only thing that comes remotely close to this shade in my collection would be MAC Vanilla pigment, although that has some pink-ish tones, while this is purely a whitened gold, it has an intense pale barely gold iridescent shimmer. It is stunning.


Neutral Mattes Palette
(Click the image to enlarge)


Top Row left to right: Embark, Handwritten, Brown Down, Corduroy, Espresso, Charcoal Brown, Cork

Second Row left to right: Brown Script, Texture, Soft Brown, Tête-A-Tint, Omega, Soba

Third Row left to right: Honey Lust (broke this and had to re-press it), Amber lights, Bisque (re-pressed as well, this doesn't work well with matte shades, they will usually stay looking cracked), Era, Bamboo, Wedge, Grain

Last Row left to right: Show Stopper (like Bisque, this is a matte shade I re-pressed, and was left looking cracked), Romp, Orb, Kid


While this palette is definitely not my favourite, and nothing about it screams glamorous to me, this has actually started to take over market share in my collection. Since the colors are neutral, and shimmer free, I don't feel juvenile or out of place when I use this palette. I'm not happy about it, but unlike when I was a teenager, I can't put as many shimmer colors as I squeeze in, on my lid space anymore. I'm genuinely upset about this.

Some of my favorites from this palette are:

Corduroy, a regular dull looking brown, is transformed on the lid. It adds the perfect brown depth, and the perfect deep brown hue. Blends very nicely and can be used in the crease, on the lid, as a liner or smudged into the lash line... this is a very versatile color considering it doesn't look all that spectacular in the palette. 

Charcoal brown is another boring color in the pan, but this soft cool toned brown actually packs quite the punch on its own or used to blend darker/lighter shades out!

Omega while I don't use this traditionally as an eyeshadow, I do use this to blend out crease work (love it for that!). I also use it in the crease on its own with a very minimal makeup look, just to make it look like my crease is extra defined without looking like I have any makeup on. This is a great shade for any form of natural looking contouring on skin tones close to mine!

Wedge and Kid like Omega are fantastic shades for blending out crease work. I like them both equally for this. I love love love them, but don't have many other purposes for them besides that.

Orb is a gorgeous natural brow highlight that is slightly peach toned so it really brightens and lifts the appearance of the brow. ADORE this color. It is newer to my collection so I will update this if I find other uses for this shade!


Red and Purple Palette
(Click the image to enlarge)


Top Row from left to right: Antiqued, Plum Dressing, Inventive (L.E.), Beauty Marked (re-pressed), Style Snob (L.E.)

Middle Row from left to right: Coppering, Cranberry, Sketch, Trax, Satin Taupe

Bottom Row from left to right: Expensive Pink, Star Violet, Twinks, (an eyeshadow I pressed from pigments and old eyeshadows), Velour (L.E.)

Some of my faves are:

Antiqued is a stunning deep burgundy, maroon, reddened metallic brown (can you tell I'm terrible at describing things haha), I absolutely adore this color in the crease!
Cranberry brings out the green in green and blue eyes, I adore this over a dark base to give a beautiful purple/plum toned glow.
Satin Taupe is amongst many people's favorites so I won't go on about this shade too much, but it is a beautiful mauve/purple taupe color. A lot of people describe this shade to be brown, but to me it seems nearly impossible to see that. This has a high shine pearlized finish.


Color Palette
(Click the image to enlarge)


Top Row from left to right: Goldmine, Dark Soul (Pressed MAC Pigment), Aquadisiac, Shale, Pink Freeze

Middle Row from left to right: Gorgeous Gold, Sumptuous Olive, Steamy, Satellite Dreams, Sweet Lust

Bottom Row from left to right: Spring Up (Re-pressed, L.E.), Green Smoke, Shimmermoss, Tilt, Hush

I'm not going to lie, this palette doesn't get enough love. Some of the eyeshadows don't get used a lot so I don't really know how much I like them.

Some of my faves:


Sumptuous Olive looks amazing on the lower lashline, or mixed with brown shades. I particularly love blending this over woodwinked to give it a more olive brown tone. This has a really nice pearlized finish. Love it!
Shale this shade actually reminds me of a more mauve version of Satin Taupe, except that it isn't a frost, it's a velvet. This shade has a very fine sheen, not high shine, but a light glow if you will. Nevertheless it's a gorgeous shade.

Monday, October 11, 2010

Foundation Routine AKA Putting My Face On

So as most of you who have come to my blog know, I had a poll up to see which video I should film next for youtube. Well it turns out my foundation routine won. I refer to this process as putting on my face, haha. And though when I think about my own foundation routine it seems dull, I can understand the curiosity since I ALWAYS want to know what other girls' foundation routines are haha!! I'm particularly jealous or curious about those girls that appear to be wearing nothing at all on their faces yet their skin is glowy and gorgeous, damn perfect specimens! Haha, so onto the goods!


Step 1 Moisturizer:
I take my favourite moisturizer, DDF's Moisture Dew, and slather that all over my face! This stuff is great, it gives me so much added moisture and it doesn't do anything bad to my skin. I love that this is so light, gets absorbed immediately and it is oil free!


Step 2 Eye cream:

I take my Clinique All About Eyes (gel formula) eye cream and apply that to under my eyes and on my lid! This cream is great because it can double as an eyeshadow base [because there's some silicone in it, Urban Decay Primer Potion is basically just silicone :) ], it is light, gets absorbed really nicely, creates a smooth finish for eyeshadows and doesn't cause any creasing, or gathering of my eyeshadows!! If you're going to use an eye cream before makeup application, I highly suggest this one because it isn't greasy like most other eye creams! (Although, this isn't the eye cream I use at night time).


Step 3 Primer:

At the moment I'm using a travel sized Make Up For Ever HD Primer (I have had the full sized version as well so I have given my skin enough time to see if this negatively affected it). While I do really like the moisture this primer gives my skin, I don't like that it doesn't give my foundation any added benefits. For example, it doesn't make it last any longer, I don't find, my pores are not reduced in size, and I wouldn't say it gives me a smoother canvas to work on. But like I said, I do really appreciate the added moisture it gives my skin, because my skin (especially on my cheeks) can dry out. I also really like that it is super light, and while it does have some silicone in it (I don't think it has very much) it doesn't feel like silicone, it is very moist and absorbs very well, and it doesn't cause my skin to break out like I have in the past from primers with silicone. Primers I did not like are Smashbox Photo Finish, and Photo Finish light, Stila Hydrating Primer, the Laura Geller spackle was just OK (made my skin kind of sticky). If you guys know any fabulous primers that are either silicone free, or really light in silicone I would LOVE to know what your faves are!!

Step 4 Foundation:

I switch my foundation up all the time, and sometimes use Dinair airbrush foundation when I'm not being lazy, but more often than not I will wear liquid foundation. At the moment I'm using Nars sheer glow in Barcelona. I really like the coverage (medium-full in my opinion) and I love the finish! It gives such a gorgeous glow (hence the name). I don't love that it doesn't come with a pump (I'll have to order one online :( ]. I use a MAC 131 Duo Fiber brush and I pull the foundation outwards starting in the middle of my face (my cheeks). And I will do crossing motions to smooth out any possible streaks!


Step 5 Concealer:


At the moment I'm using MAC's Studio Finish concealer in NC35 (although I would suggest an NW shade for under eyes to cancel out the blue/purple tones, and a cooler shade for blemishes to cancel out the redness). While I was away I wore the Make Up For Ever Full Cover concealer for a day and LOVED it! Unfortunately I forgot about it and never went to buy it and now I can't remember the shade I wore. So to apply my concealer I use a fluffy brush, I used the MAC 225, although this changes depending on which brush is closest and cleanest haha! I always use a fluffy brush for both my concealer on blemishes and under eyes. Why? Because it lightly diffuses the product, as opposed to some flat synthetic brush which can actually remove more product than it applies. If you feel you need extra coverage the best tools are your fingers to control how much concealer you need! :)


Step 6: Highlight

For highlight, and I don't do this all the time,
but I will take Yves Saint Laurent Touche Éclat in both 2 and 3 and I will apply these in different areas. I will take number 3 (because it is closer to my skin tone than number 2) and I will apply this right under my eyes. The peachy light reflective tone helps minimize the look of my purple under eye area. I'll take a fluffy brush and blend it into my skin and bring it into the inner corner of my nose where my skin is the most blue. With number 2 I will put this just on the inner corner of my eyes and blend that up into the inner corner of my nose/eyes as well. Sometimes I will apply this for a highlight under my brow, on my cheekbones and down the middle of my nose. Because this is an illuminating product and has light reflective properties, stay away from using products like these on blemishes because they will draw light to that area.


Step 7 Powder:


Lastly I'll take some form of finishing powder, my fave is MAC MSFN (or Mineralized Skin Finish Natural) in Medium Plus LOVES IT. When I want to look more matte I'll use Make Up For Ever's Microfinishing Powder (which is basically straight up silica). I buff this into my skin with a MAC 182 Kabuki brush (the most fabulous kabuki your face will ever have the pleasure of meeting). And finité!