
Sunday, December 22, 2013
How To Make Glühwein: Traditional Holiday Mulled Wine! :)
I hope you guys enjoyed this how-to/recipe type tutorial for making mulled wine (or what is known as Glühwein in Germany). I had so much fun filming it, and I was so in love with filming Christmas videos that were inspired by the traditions they have in Germany (where the modern celebration of Christmas came from) that I wanted to share my love, excitement, and enthusiasm, with all of you. Below is the recipe for my customized German Glühwein!
Recipe:
You'll need:
2 bottles of a dry red wine (and it is better if it's a cheaper bottle of wine; all the spices mask the flavor anyway hehe)
Whole star anise pods** (See ** below)
Whole black peppercorns**
Whole Clove spice**
Whole cinnamon sticks**
Whole allspice berries**
Honey
Orange juice
4 medium-large lemons
2 navel oranges
Amounts:
5-6 All spice berries
1/4 tsp. Whole cloves
1 tsp. Whole black peppercorns
2 Whole star anise pods
4 Whole cinnamon sticks (plus more for garnish)
5 Slices from a navel orange (plus more for garnish)
5 Slices from a lemon (plus more for garnish)
1/3 - 1/2 cup of honey (depending on how sweet you'd like your wine)
1/2 cup fresh lemon juice
2 bottles of dry red wine (we used a cabernet sauvignon)
1 1/2 cups of pulp-free orange juice
Instructions:
Add allspice berries, cloves, black peppercorns, and star anise pods, cinnamon sticks, orange and lemon slices into a coffee filter, pot, or large coffee urn. Add your wine, orange juice, and lemon juice into your pot/urn or coffee maker. Turn it on and let it sit to marry together for about 1.5 hrs - 2 hours (even after it has turned off so that the flavours mellow). If using the pot method, turn it on medium-low heat for about 20 minutes, keep an eye on it and stir often, and then reduce to low heat for about another hour to an hour and a half!
When you're done feel free to use some Irish Coffee cups (mine were $2.50 from Walmart), garnish with a nice, long cinnamon stick and a couple orange slices (or lemon depending on preference) and you have an amazing drink that is perfect for the holidays (or any cold day :)).
Enjoy!!!
Thursday, December 19, 2013
Sugar Plum Fairy Makeup Tutorial
I was hesitant on posting this video because the colors didn't show up as vibrant as they were in person (by FAR) and even trying to color correct it was a nightmare. Nevertheless, since you guys asked, I decided I should just post it! :) I hope you all enjoy my inspired makeup look for the Sugar Plum Fairies (even if it IS a little glittery hehe)! :) I saw the Nutcracker last night (December 14th) and I had the most amazing time! Check my instagram if you'd like to see a picture of my Nutcracker partner and I from last night! :)
What I'm wearing!
Eyes:
Laura Mercier Eye Basics Primer - Wheat
MAC Paint Pot - Let's Skate!
Too Faced Sweet Indulgence Palette - Cherry Cola
MAC Eyeshadow Single - Satellite Dreams
MAC Eyeshadow Single - Star Violet
Too Faced Sweet Indulgence Palette - Satin Sheets
MAC Kohl Power Liner - Feline
MAC Glitter - Reflects Gold
Red Cherry #107 Lashes
Lancôme Hypnose Mascara - Deep Black
Too Faced Sweet Indulgence Palette - Fuzzy Peach
Cheeks:
Too Faced Sweet Indulgence Palette - La Vie En Rose
Too Faced Sweet Indulgence Palette - Candlelight Glow
Lips:
MAC Lip Pencil - In Sync
Bite Beauty Lipstick - Vouvray
MAC Glitter - Reflects Gold
Love you all, Merry Christmas and Happy Holidays!!! :)
My vlog and everything-else channel!
http://www.youtube.com/ShimmersSecrets
Follow me on twitter!
http://www.twitter.com/Kristi_AnneB
My website
http://www.Kristi-Anne.com
Add me to Instagram!
moonbeamshimmers
Follow me on Pinterest!
http://www.pinterest.com/moonbeamshimmer
Follow me on Google+
http://www.google.com/+KristianneBeil
Add me to Facebook!
http://www.facebook.com/Moonbeamshimm...
Ask me anything anonymously! (Formspring)
http://www.formspring.com/MBSB
My blog
http://www.moonbeamshimmerblitz.com
Email me!
askmbsb@gmail.com
FTC: Everything in this video, including royalty-free music from AudioJungle, was purchased by me!! :)
Christmas Haul: Pier1 and Bath & BodyWorks
Again, I filmed this Christmas Haul a while ago but unfortunately my school has been overwhelmingly demanding. I have 3 other videos to finish editing and then post. I'm super excited about them! I hope you guys are all having a wonderful holiday season :) Below is a "wishlist" that I added mostly all of the items from Pier1 just so everything is a little more organized :), and apart from that everything from Bath & BodyWorks can still be found on their website, which I've linked below :)
Pier1 stuff:
https://www.pier1.com/on/demandware.s...
[I wasn't able to add the fizzy bath bombs to the 'wishlist' but they are searchable from the website :)]
Bath & BodyWorks:
http://www.bathandbodyworks.com/
What I bought from B&BW:
3-Wick Candles:
- Merry Cookie
- Winter Candy Apple (but I exchanged it for the Winter scent yay!)
-'Tis the Season
Mason Jar Candles:
-Twisted Peppermint
-Vanilla Snowflake
-Mint Chocolate
-Snow Day
3 oz. Candles:
-Fresh Balsam
-Mint Chocolate
-Marshmallow Fireside
Foaming/Cleansing Hand Soaps:
-Iced Gingerbread
-Vanilla Bean Noël
-Twisted Peppermint
-Sugared Vanilla Wish
-Winter Candy Apple
-Vanilla Snowflake
-Snow Kissed Mint
-Fresh Balsam
Hand Sanitizers:
-Candy Cane Bliss
-Vanilla Bean Noël
-Iced Gingerbread
-Nutcracker Sweet
-'Tis the Season
Wallflower Plugin:
-Red Ornament
Wallflower Bulbs:
-Marshmallow Fireside
-Winter
-Fresh Balsam
-'Tis the Season
-Vanilla Snowflake
-Snow Day
Love you all. Merry Christmas!!!
My vlog and everything-else channel!
http://www.youtube.com/ShimmersSecrets
Follow me on twitter!
http://www.twitter.com/Kristi_AnneB
My website
http://www.Kristi-Anne.com
Add me to Instagram!
moonbeamshimmers
Follow me on Pinterest!
http://www.pinterest.com/moonbeamshimmer
Follow me on Google+
http://www.google.com/+KristianneBeil
Add me to Facebook!
http://www.facebook.com/Moonbeamshimm...
Ask me anything anonymously! (Formspring)
http://www.formspring.com/MBSB
My blog
http://www.moonbeamshimmerblitz.com
Email me!
askmbsb@gmail.com
FTC: Everything in this video was purchased by myself, my mom, and Sebastian :)
DIY Holiday Advent Calendar: Christmas Gift Wrapping
Learn how to make 3 different versions of an advent calendar - they'll be the fastest and easiest advent calendars you've seen to date (not to mention the most affordable, hehe). Let me know what you think in the comments below. I always use your guys' feedback to improve my videos, and it's so helpful to me!
I sincerely apologize that this is up so late! I had spent the last 11 days trying to get this video up. Unfortunately the grading effects I added using Magic Bullet Looks ended up causing a glitch in FCP X on Mavericks, and since then I had been trying absolutely EVERYTHING I could think of to get this video exported... long story short, it took over a week to do so, but I had spent so long editing this video as it was, that I didn't just want to scrap it - if that makes any sense. So here it is! My take on the traditional advent calendar, DIY style. While I was editing this I realized it could also be the "host" package to deceive people when wrapping smaller sized gifts! Everyone says the best gifts come in small packages; here's a way to hide what that package might actually contain ;)
Advent calendars were invented in Germany about 200 years ago to count the days in December left until Christmas. It started with drawing chalk lines on people's doors and lighting 24 candles, and in 1905 the first advent calendar was printed.
In Germany it is common to craft advent calendars for your family or friends and add candy or little gifts for the person that the calendar is for.
Thank you. Love you all!
Kristi-Anne
Below are the advent calendar printouts! :)
http://www.makoodle.com/diy-advent-ca...
http://www.thriftyandthriving.com/201...
http://api.ning.com/files/MJwDGAzzVZI...
http://1.bp.blogspot.com/-4gGh9R8Pnyw...
http://itsthelife.typepad.com/.a/6a00...
http://itsthelife.typepad.com/.a/6a00...
My vlog and everything-else channel!http://www.youtube.com/ShimmersSecrets
Follow me on twitter! http://www.twitter.com/Kristi_AnneB
My website: http://www.Kristi-Anne.com
Add me to Instagram! moonbeamshimmers
Follow me on Pinterest!http://www.pinterest.com/moonbeamshimmer
Follow me on Google+ http://www.google.com/+KristianneBeil
Add me to Facebook!http://www.facebook.com/Moonbeamshimm...
Ask me anything anonymously! (Formspring):http://www.formspring.com/MBSB
My blog: http://www.moonbeamshimmerblitz.com
Email me! askmbsb@gmail.com
FTC: Everything in this video was purchased by myself and Sebastian :)
Wednesday, December 18, 2013
Fall Haul and Decor: Thanksgiving Table Setting
Watch my Thanksgiving decor table setting with pumpkins from a local country farm, products from Pier 1, and a fall haul with amazing candles, wallflowers, scents and hand soaps from Bath and Bodyworks.
Where I've been - My vlog! https://www.youtube.com/watch?v=JDjfM...
My vlog and everything-else channel!http://www.youtube.com/ShimmersSecrets
Check out my follow-me-around vlog for my first experience at The Pumpkin Patch! :)
http://www.youtube.com/watch?v=XpRNRp...
Follow me on twitter! http://www.twitter.com/Kristi_AnneB
My website: http://www.Kristi-Anne.com
Add me to Instagram! moonbeamshimmers
Follow me on Pinterest!http://www.pinterest.com/moonbeamshimmer
Follow me on Google+ http://www.google.com/+KristianneBeil
Add me to Facebook!http://www.facebook.com/Moonbeamshimm...
Ask me anything anonymously! (Formspring):http://www.formspring.com/MBSB
My blog: http://www.moonbeamshimmerblitz.com
Email me! askmbsb@gmail.com
Bath and Bodyworks Haul:
Sweater Weather 3-Wick Candle
http://www.bathandbodyworks.com/produ...
Autumn 1.3 oz. Mini Candle
http://www.bathandbodyworks.com/produ...
Cider Lane 3-Wick Candle (they are sold out of the mason jar size)
http://www.bathandbodyworks.com/produ...
Pumpkin Pecan Waffles 1.3 oz. Candle
http://www.bathandbodyworks.com/produ...
(again, sold out of the other sizes)
Leaves Mason Jar Candle
http://www.bathandbodyworks.com/produ...
Pumpkin Caramel Latte Mason Jar Candle:
http://www.bathandbodyworks.com/produ...
Pumpkin Caramel Latte Fragrance Bulb
http://www.bathandbodyworks.com/produ...
Pumpkin Apple Fragrance Bulb
http://www.bathandbodyworks.com/produ...
Marshmallow Fireside Bulb
http://www.bathandbodyworks.com/produ...
Lavender Vanilla Bulb
http://www.bathandbodyworks.com/produ...
Oak Leaf Sconce Plug
http://www.bathandbodyworks.com/produ...
Owl Wallflower Plug
http://www.bathandbodyworks.com/produ...
Copper Maple Leaf Plug
http://www.bathandbodyworks.com/produ...
Pumpkin Cupcake Foaming Hand Soap
http://www.bathandbodyworks.com/produ...
Pumpkin Caramel Latte Foaming Hand Soap
http://www.bathandbodyworks.com/produ...
Creamy Pumpkin Foaming Hand Soap
http://www.bathandbodyworks.com/produ...
Creamy Pumpkin Deep Cleansing Hand Soap
http://www.bathandbodyworks.com/produ...
Table Setting!
Pier 1 Imports:
Pumpkin Bowls
http://www.pier1.com/Pumpkin-Lidded-B...
Pumpkin Salad Plates
http://www.pier1.com/Pumpkin-Salad-Pl...
Spice Route Round Dinner Plate - Sesame
http://www.pier1.com/Round-Dinner-Pla...
Spice Route Round Side Plate - Sesame
http://www.pier1.com/Round-Salad-Plat...
Winners/HomeSense:
Orange pumpkin soup dish is not online, but may be available at select stores :)
FTC Disclaimer:
Everything you saw in this video was purchased by myself and my roommate :) This is not a sponsored video! :)
Credits:
All music and additional video (and graphics) in this video I have purchased with licenses from royalty-free web services.
Sunday, February 19, 2012
How to Look Like a Sexy Dinosaur: Vampire Diaries Hair--Rebekah Mikaelson
Hi everyone! So as promised, finally a post before the video goes live. Yay me! (Haha for any London Tipton fans out there). This is an inspired hair style from the Vampire Diaries episode: Dangerous Liaisons. Rebekah Mikaelson had her hair in an exquisite, perfectly polished down-do that was pulled back and elegant. It is actually a ponytail hidden behind a section of hair. In the episode I'm inclined to think there were some hair pieces involved because she managed to have a lot of additional length and her pony was incredibly voluminous, it looked AH-MAZING. I will also link this to my YouTube tutorial once it has gone live. In the mean time, I have some pictures of the inspired look below. And since I don't know the rights to any of the pictures I am posting, I am not able to show them in my YouTube video, luckily I am able to show them here! :)


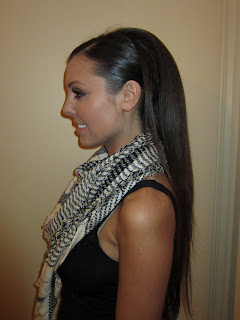


[Click the photos to enlarge! :)]

(Click here to watch the tutorial in motion!)


As you can clearly see here she appears to have a LOT of hair which makes me think there may have been a hair piece attached as well.


Tuesday, May 31, 2011
Two birds, One stone

Busting a Common Myth, & My New Favorite Snack!
Here we have it, my first post with some info about my diet! I figured I'd get started anyways because my diet and fitness seem to be winning by a landslide for new things to post about!
Preface: Alright, so the number one thing I get asked about is my weight. People frequently ask me about my fitness routine and my diet. Well to be honest, I don't do a WHOLE lot, however, that isn't to say that WHAT I do won't yield results if followed. The reason I say this is because people who started to follow the routine I kind of grew up doing, not knowing any better, actually lost weight. For example when my boyfriend moved in with me he lost 25 - 30 lbs. in a couple of months! It sounds really shocking, but his lifestyle before he moved in with me was entirely different. The foods he ate were different and when he ate was different. I will do a separate post on this another time, because I'm kind of a freak of nature and it will take a little bit of explaining to do in order for this to all make sense. It will be a little bit of a longer post since I have weird eating routines; I'm very habitual, and I also eat very specifically. Right now I'm just going to talk a little bit about one of my new favorite snacks. When I said I was habitual, I mean it. I eat this snack nearly every day and let me tell you some of the benefits of this deliciously decadent green dip!
Myth: Avocados are bad for you and will make you fat.

So up until this past year and a half I wouldn't go near an avocado with a 10 foot pole. Actually, I lie. I would eat it but only IF it was so well masked I didn't know where or in which form it was hidden. Now however, my gosh, it is in my salad, on my plate, in a dip, spread, topping in some form or SOME HOW. Currently I've been obsessing over guacamole. I've made it on my own and bought various packaged varieties. My favorite to date is Wholly Guacamole. Now, I know that a lot of people LOVE avocados just like I do, but steer clear of them for one reason: it is STUPENDOUSLY high in fat! Wondering why I used the word stupendous over other adjectives? Because it is GOOD fat. Most people don't know the difference, but let me break it down for you. GOOD fats are those that come from vegetables and are liquid at room temperature (chilled however, they will turn to solids), BAD fats are those that usually come from animals or animal by-products, and in contrast to good fats are solid at room temperature. Good fats include monounsaturated fats and polyunsaturated fats. The difference between the two is only chemistry. The opposite, bad fats, would be saturated fats. Poly and mono unsaturated fats promote heart health, and THINNESS. So, the thick white grease that's left over after you cook bacon, that would be bad fat, verses olive oil you're using for your salad dressing which would be good fat. Although, just because I say good fat doesn't mean it is good in excess. While it's true it still is MILES above being better for you than bad fats, it shouldn't be consumed in copious amounts. Why? Calories. Fats in general have 9 calories per one gram, that's a looottttt of calories. Limiting them is the best way to keep calories down, but replacing your regular calories with this good fat can be beneficial to your heart, health, and figure--it cuts down your belly fat (when replacing high carb diets with monounsaturated fats)! And one more HUGE reason for us gals to consume more monounsaturated fats? It decreases risk of breast cancer according to a Swedish study!!
 |
| Reduce belly fat! |
Benefits of avocados!
- High in monounsaturated fats which lower cholesterol and prevent heart disease! (Replace 5 percent of your saturated fats with monounsaturated fats to cut risks of a heart attack by over 1/3!!)
- Has 25% of your daily requirement of vitamin C
- Has Vitamin A, Vitamin E, Oleic Acid, Folic Acid, Cartenoids (great for eye health), Calcium, B6 and more soluble fibre than any other fruit!
- Has 60% more potassium than bananas!
Quick tip:

20 Minute Beauty:
- All famous avocado mask: I'm sure we've all seen this in the movies, well it's simple enough to do! Mash up an avocado add a tablespoon of organic honey (which has antibacterial and anti inflammatory benefits). Avocado has specific sugars like D-manno-heptulose which can improve the structure of the epidermis by boosting collagen as well as providing a protective antimicrobial barrier. Apply it to your face for 15-20 minutes to reveal more radiant and nourished skin!
- Hair mask: Take 1 ripe avocado and mash it well. Mix 1 tbsp of honey and 1 tbsp of olive oil. Mix them well. Apply it to your scalp and using a wide toothed comb smooth it through your hair. Wash it off after 20-30 minutes. Do this up to once a week for shiny manageable hair!
- Body butter: Smooth mashed up avocado over rough patches of skin for 20 minutes to soften the driest areas of your skin!
- Big date? Woke up with puffy eyes? Take a slice of avocado, the same as you would with cucumber, place it under the eyes for 20 minutes, relax, and done. Puffy-eyes-begone. Avocado, like cucumber, has nutrients that stimulate circulation!


And now for the best part, why I love avocado. GUACAMOLE!
Why it's good not only nutritionally for your diet, but also good at helping you stay on your diet!
 Well first of all it's delicious, it's a health food that doesn't taste like a health food. But it is also very filling! I buy packages of Wholly Guacamole from the grocery store which are preservative and chemical free, but also the best tasting guacamole I've yet to find. I will scoop about 70-80 grams of guacamole in a bowl and that fills me up for a small meal replacement. Half of the contents is 198 calories but what I eat is between 140 and 160 calories. And those of you that are lucky might even live somewhere where the 100 calorie snack packs are available! I eat it with Tostitos Tortilla Rounds. There are approximately 40 chips per 50 grams for 270 calories, I consume about 35 grams which is 189 calories. I know they are deep fried but I haven't found a baked alternative in Canada, although I have seen baked Tostitos tortilla chips in the US. You could also make your own, which would be a little bit more preparation by cutting up tortilla flat into bite sized pieces, brushing them lightly with olive oil, seasoning them, and putting them in the oven until they are crispy. No doubt this would reduce the calories from fat, but requires more time. Also, don't be afraid to spread guacamole on a cracker, on a sandwich, as a spread on flat bread, or even eat it on its own! In any way, shape, and form it is simply amazing!
Therefore a very filling and deliciously satisfying snack would be:
140 - 160 Calories from guacamole
189 Calories from tortilla chips
= 329 - 349 Calories total
I find savory foods tend to feel more like meals. The great thing is, this feels and tastes like a meal. It keeps me satisfied for hours. I don't feel starved even hours after eating this. Because avocados are so high in fibre (both insoluble and soluble) which your body needs to keep its digestive tract running efficiently. But what fibre also does is it slows the breakdown of carbohydrates in your body which makes you feel full for longer! How could it get any better? :)
I'd like to close by saying myth officially BUSTED.
Saturday, May 21, 2011
My take on Katy Perry's E.T. Warrior Makeup!
So let me preface by saying, I was so in love with the look of this makeup when I watched the video that I wanted to recreate it but make it wearable so that I could leave the house in it. HAHA well that didn't end up happening. I started off by taking high quality screenshots of the video on VEVO to start my transformation. And while I was trying to make this look "wearable" I ended up copying the look as closely as I could (apart from the warrior paint) stroke for stroke. I still love the makeup, I wish I could find a way for it to be acceptable in public haha! The tutorial will be on my YouTube channel, and when it is finished uploading I will post the video to this page. Below won't be a run down of what I did to achieve the look since it is very detailed and takes a long time, but I am going to list some pointers!
First, tape! If you're trying to create a perfect angle to use as a guide, I highly suggest taping from your lower lashline, at an angle out and upward toward your temple. This not only gives you a clean guide to work with afterward but it keeps the area under the tape clean which will make your lines look much more defined!
Curl lashes well PRIOR to makeup application. You don't want to risk messing up your hard work, whether it be this look, or another labour intensive look, in one of the last stages of completion!
Second keep cotton swabs nearby. Preferably a generic brand. I find the Q-tip brand tries to be more "plush" so you get lots of cotton on your swab, whereas generic brands tend to be more tightly wrapped and use less cotton. Think about generic toilet paper vs. non-generic, generic reminds me of sand paper, while non-generic is soft and gentle haha. Cotton swabs are great for "oopsies". Which trust me, I made hundred of.
Cutting the crease. This is a technique a lot of really gifted and talented makeup artists use. It is a precise sharp line that makes makeup look incredibly artistic and dramatic. An easy way to start cutting your crease is with an eyeliner in the color of your choice. The fine tip and precision your eyeliner is going to provide will make an easier transition into placement of color and sharp perfect lines. Eyeshadows can sometimes be messy, and without a steady hand can end up everywhere and not as "clean", "sharp", or "cut" as desired. Also, for cut creases, if you're looking to venture into this world, matte shades work better than glittery or shimmery shades. Shimmery shades have more fall out because in general they are more loosely packed from the fine particles of shimmer in the shadow.
Making your lines look sharp: If you have problems making your lines look clean and sharp and easy way to trick people into thinking you're an expert with precision is to take a flesh toned creamy concealer or base to use next to any line you want to appear sharper and more defined. What I did was I took my MAC paint pot in the color Soft Ocre and I took a small synthetic precise brush (MAC 231 brush) and created brightness along my lines on the inner corner of my eye. I used a flesh toned paint pot in this area and not a creamy concealer because I don't want the makeup to move or crease. If you're working with color, same rule applies, use some form of product in the same manner to clean up your lines (covering any blemishes or flaws in your precision work). For under eye area, keeping the area clean and sharp is easier. Take a creamy concealer of your choice, I used Bobbi Brown's creamy corrector in Light Peach and a synthetic concealer brush. I used the soft pliable bristles of the concealer brush to create a sharp line of the shadows on my lower lash line by sweeping/dragging the concealer in a clean smooth motion along the line I was already trying to create.
Keep brush cleaner near-by so you can reuse your brushes! I applied mine to a cosmetic round and applied it to a hard plastic surface so that I could reuse brushes that don't require a long drying time. After cleaning off the product off the brush I'd dry it well. Not drying it properly will create "crusts" on top of your eyeshadows.
For incredibly clean, sharp lines
Be patient young grasshopper, doing any finely detailed look requires time and practice. I messed up so many times on the same areas it was ridiculous. That's what cotton swabs are for! Have fun with it, it doesn't have to be perfect, make it your own!
Have everything you need close by because complicated looks can take awhile, and the best way to lose motivation is to not have what you need near you haha.
Plan your attack first, think of your complicated looks in layers and think about what needs to be done first and last. That way you don't have to wash it off and start again! :)
And voila, some tips on helping any of you, like me, with less than expert abilities appear like experts! :)
Below are the screenshots I took to use for reference!


Products Used
- MAC Soft Ocre Paint pot
- Scotch Tape Matte Finish/Magic Tape
- Mixed MAC Wedge with MAC Grain eyeshadow
- Rimmel Special Eyes Precision liner in Rich Brown
- MAC Corduroy eyeshadow
- MAC Blacktrack fluid liner
- MAC Bronze eyeshadow
- Bobbi Brown Creamy Corrector in Light Peach
- Too Faced Naked Eye Palette Stiletto eyeshadow
- Laura Mercier Metallic Cream Eye Color in Platinum
- MAC Soft brown eyeshadow and MAC Corduroy eyeshadow mixed
- QUO #808 False Lashes with Duo Lash adhesive
- Obsessive Compulsive Cosmetic's Lip Tar in Petty Beige
- Gosh Giant Sun Power 001
Brushes Used
- Large generic brand shader brush (eye)
- MAC 266 Small Angle brush (eye)
- MAC 219 Pencil brush (eye)
- MAC 210 Precise Eye Liner brush (eye)
- Smashbox #15 Definer brush (eye)
- MAC 231 Small Shader brush (eye)
- Lise Watier Blending brush (eye)
- MAC 214 Short Shader brush (eye)
- MAC 321 Lip brush (lip)
- MAC 109 Small Contour brush (face)
Subscribe to:
Posts (Atom)